Originally published by Hip Kit Club on hipkitclub.net.

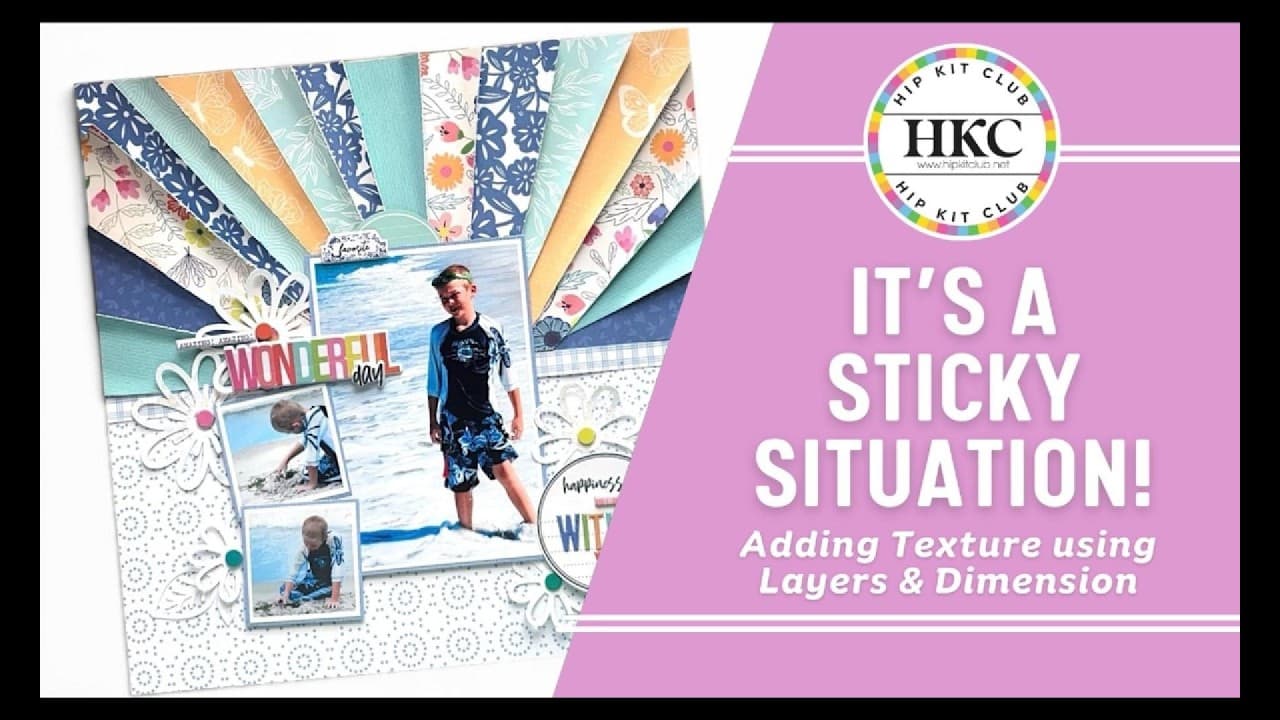
Hi friends! I am so excited to have Shanel Pettyjohn from the Hip Kit Club design team here today, walking us through one of my favorite techniques for adding movement and texture to a layout: a gorgeous layered sunburst that radiates right across the page. Shanel built her entire sunburst using papers pulled from the May 2026 Main Kit, and she anchored everything on a sheet from the May 2026 Cardstock Kit. If you have ever looked at a sunburst layout and thought it seemed way too complicated to tackle, I promise this project is going to completely change your mind.
What I love most about Shanel’s design is how she leans right into that imperfect, rough-edged look, varying her strip widths and distressing the edges so the whole thing feels organic and full of dimension. She finishes the layout with loose flowers die cut from the May 2026 cut files, shimmered up with Fairy Fluff from Lindy’s Gang, plus a colorful mix of die cuts, puffy stickers, and puffy alphas. The blues mimic the ocean while those bright embellishments bring so much color and energy to the page. So grab your kits and let’s create this beauty together, one ray at a time.
Step-by-Step Tutorial
Step 1: Cut Your Patterned Paper Into Strips
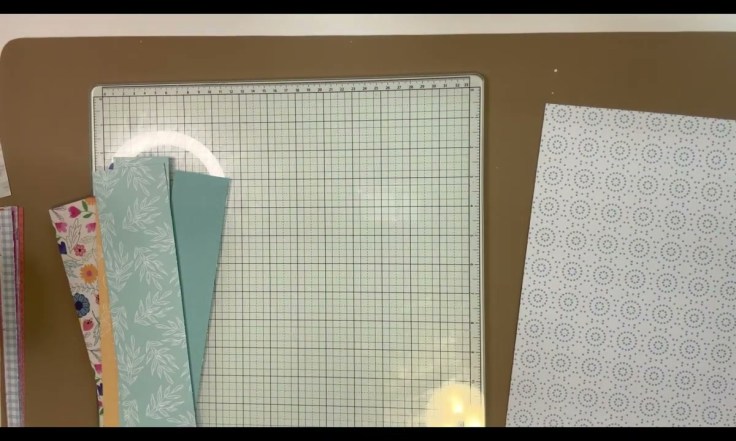
Shanel starts by selecting several papers from the May 2026 Main Kit and cutting them into strips that vary in width from 2 inches to 2-1/2 inches to 3 inches. She purposely keeps the widths different because a perfectly uniform sunburst is not the goal here. Since the burst only travels about halfway down the page, she trims the 12-inch strips down to around 8 inches so you are not wasting any paper.
Step 2: Cut the Wedges and Distress the Edges
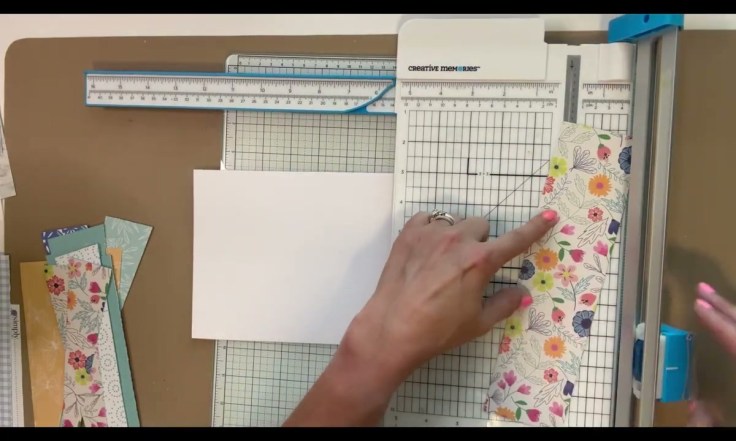
Line your strips up on your cutter and slice them into wedge shapes, angling the blade so you are not going exactly corner to corner. They do not need to be perfect pie slices, just loose wedges, and you will end up with about 15 to 16 of them. Shanel then distresses the edges with regular scissors, and her tip is that you do not need a fancy distressing tool because plain scissors work just as well.
Step 3: Arrange Your Rays on White Cardstock
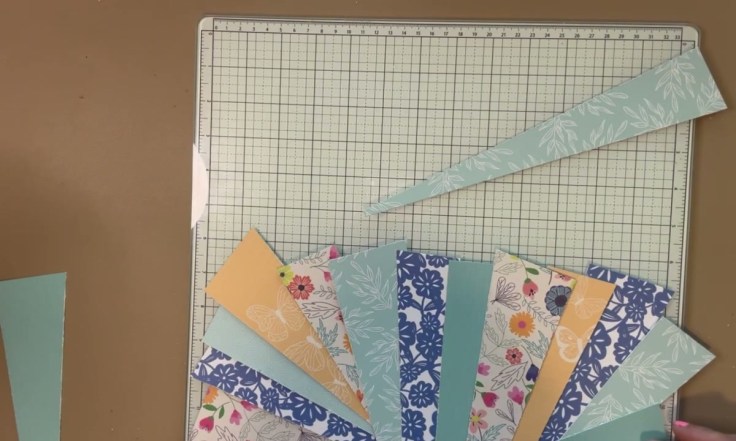
Grab a 6 by 12 inch piece of white cardstock to build your sunburst on, and lay the wedges out so they meet close to the center. They will not all hit one exact center point, and that is perfectly okay. Slant them on both sides and let the middle pieces run more straight up and down, and do not glue anything down yet so you can shuffle pieces around until the colors and patterns feel just right.
Step 4: Glue Down and Fold for Texture
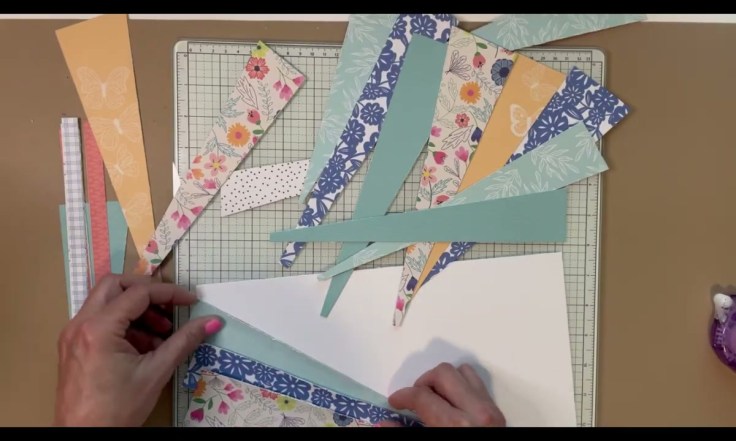
Once you love the placement, glue the rays down, layering each one slightly over the last. As you go, fold and pinch the edges with your fingers to add that gorgeous texture and dimension. It is going to look a little wonky at first, but you have to trust the process, because those rough edges and layers are exactly what make it turn out beautiful.
Step 5: Tuck the Rays to Complete the Sunburst
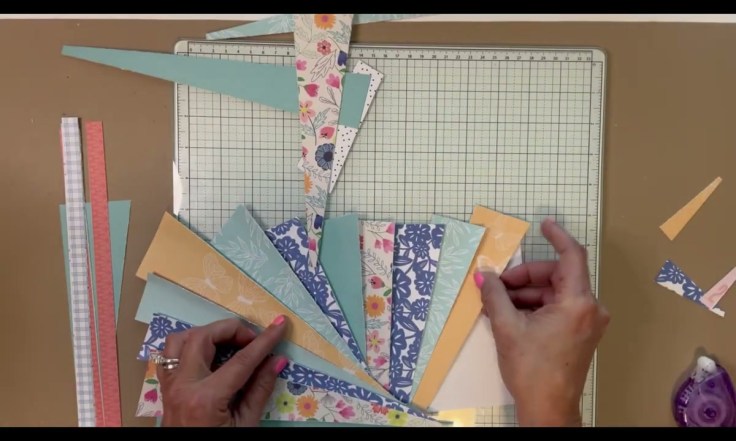
Keep working your way around the burst, tucking each new ray underneath the one beside it so the layers all flow in the same direction. Bend the edges slightly as you tuck so the sunburst reaches all the way around. If you spot a gap or decide you want more of a certain color, just cut another quick strip, distress it, and slide it right in.
Step 6: Flip Over and Trim the Excess
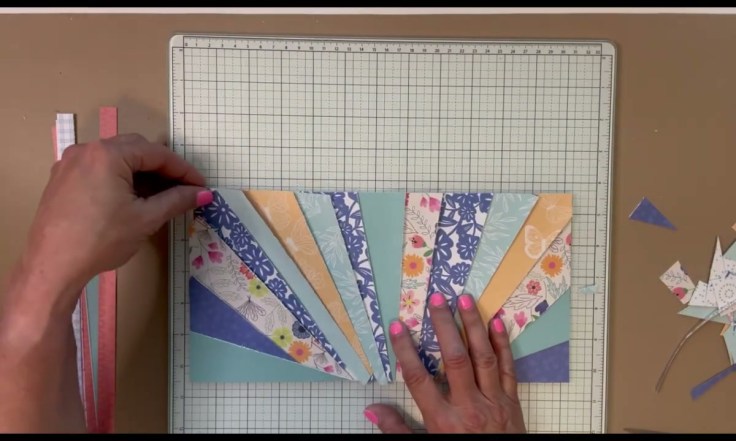
When all your rays are in place, flip the whole piece over and use your scissors to cut off the excess paper hanging past the cardstock. Shanel recommends scissors over a paper trimmer for this step because you have so many layers built up here. Flip it back over and voila, you have a clean, beautiful sunburst.
Step 7: Mount Your Sunburst on the Background
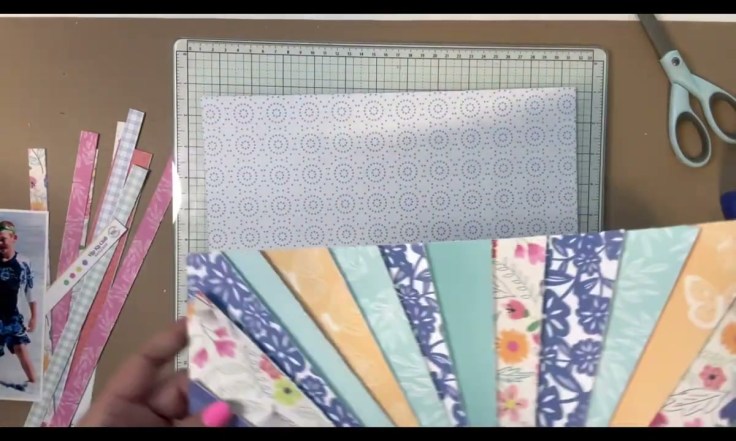
Choose one of your strips to anchor the sunburst to your background paper and cover up any little imperfections along the base. Because it is a fairly heavy piece, Shanel uses a tape runner plus a little bit of liquid glue to make sure it really stays put. Press it down onto your background paper and you have the foundation of your layout.
Step 8: Add Shimmer and Final Embellishments
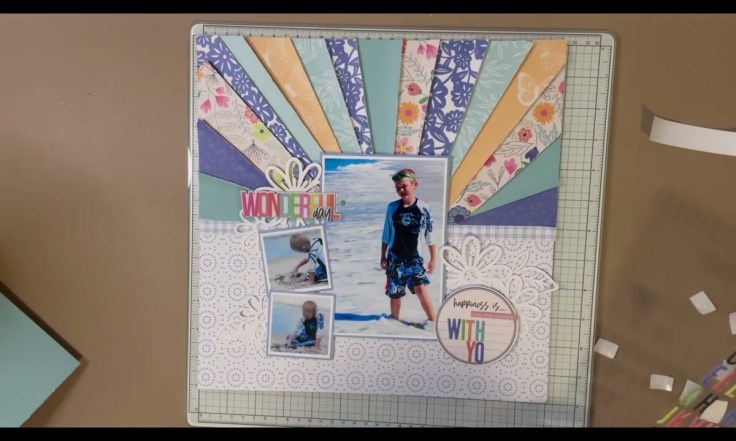
For the flowers, Shanel die cut the loose flowers from the May 2026 cut files in white, then brushed wet adhesive onto each one and shook Fairy Fluff from Lindy’s Gang over the top for a beautiful shimmer. Seal it with a light coat of Mod Podge or any clear water-based glue so the glitter does not shed all over your layout. Finish the page with die cuts, puffy stickers, and puffy alphas to bring pops of color and energy against all those pretty ocean blues.