Step-by-Step Tutorial
Step 1: Draw Your Bracelet Base Line
▶ Watch
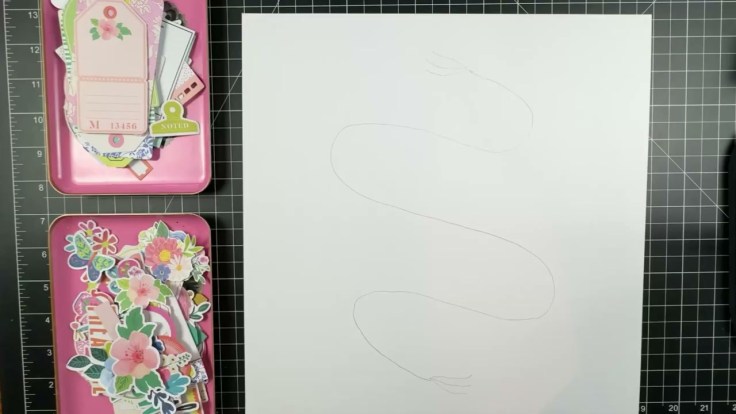
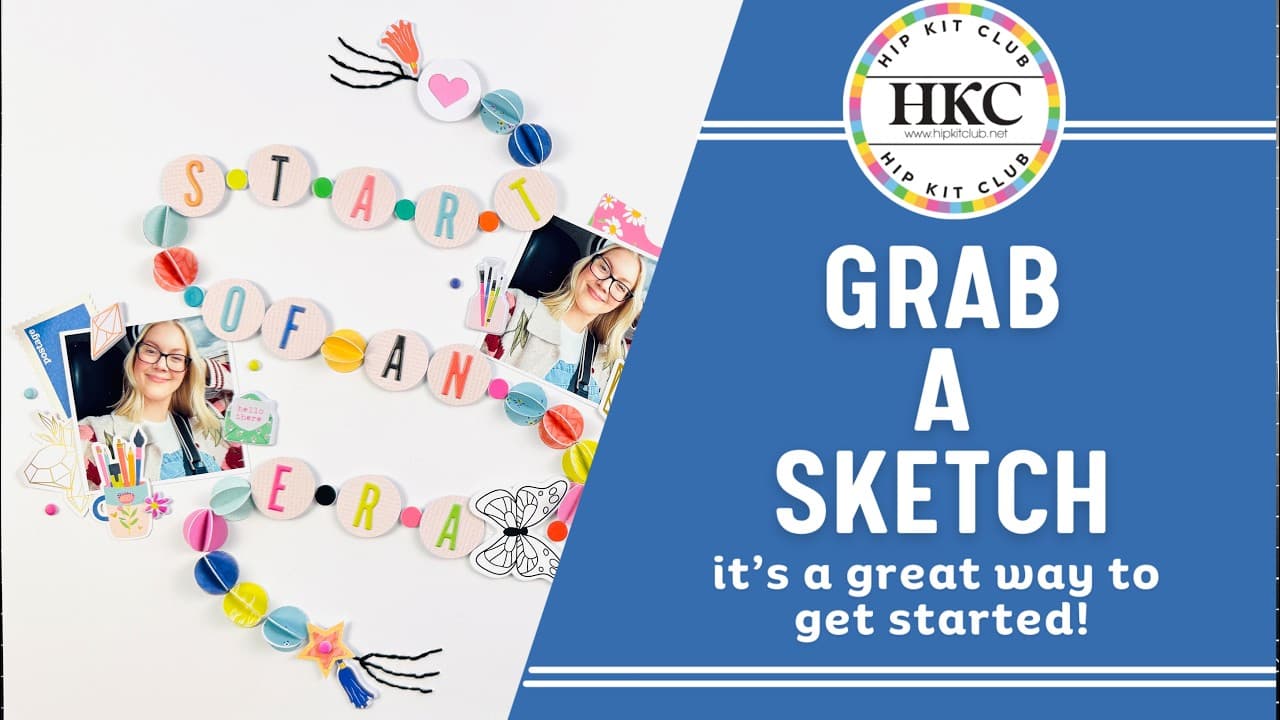
Start by drawing a soft, squiggly line across a piece of plain white cardstock from the May 2026 Cardstock Kit. This line becomes the “string” of your bracelet and gives you a natural path to follow when placing your beads. Keep the curve loose and organic so it looks like a real bracelet draping across the page. Do not worry about making it perfect, the beads will sit right on top of it.
Step 2: Make Your Round Paper Beads
▶ Watch
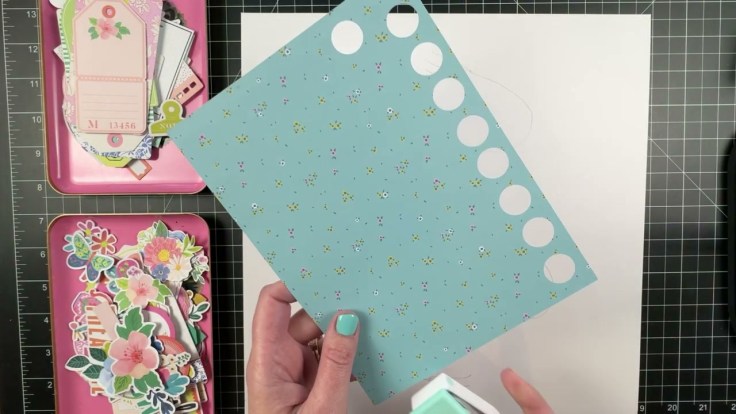
To create a round bead, punch four blue circles from the 6×8 Paper Pack, fold three of them in half, and glue those three halves together to form the bead shape. Then secure that little bundle onto the fourth flat circle, which acts as your base. Heidi‘s smart tip here is that the flat base lets you move each bead around on your background until the placement feels just right. Make several beads in different colors from the 6×8 paper so you have plenty to work with.
Step 3: Create the Heart Bead
▶ Watch
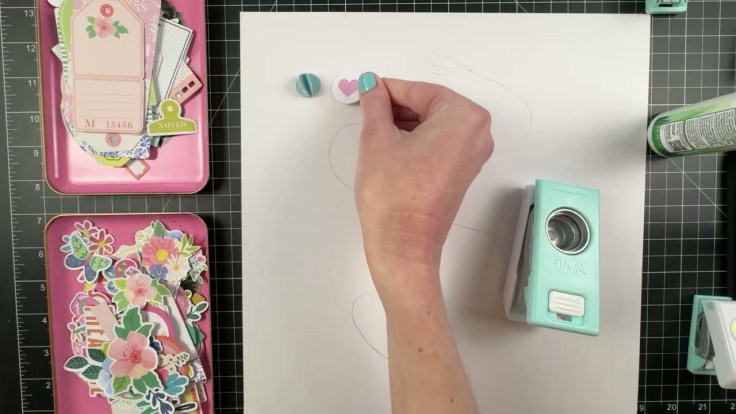
For a sweet heart bead, punch a heart from plain white paper, then punch a circle around that heart so it is framed inside the circle shape. Next, punch a matching circle from pink paper and glue the two circles together to back the heart. This gives you a dimensional little heart bead that adds the perfect feminine touch to your bracelet.
Step 4: Punch Letter and Star Beads
▶ Watch
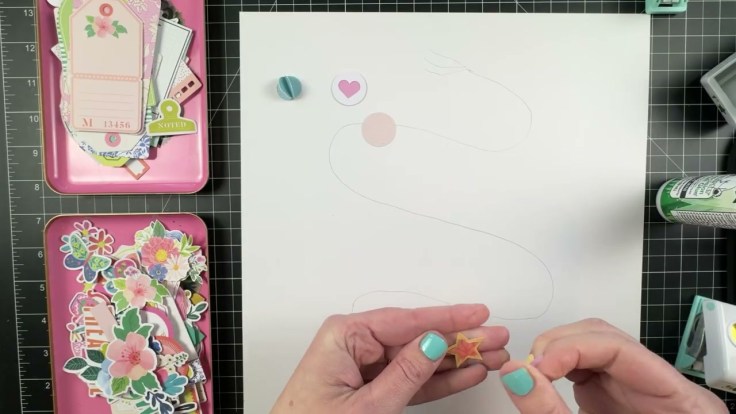
Punch several circles from plain pink cardstock to turn into your letter beads, which will spell out your title. Then make a star bead by punching a small star from red patterned paper and a larger star from plain orange cardstock, gluing the two together so the small star sits on top. Mixing in these different bead shapes keeps the bracelet feeling playful and full of variety, just like a real charm bracelet.
Step 5: Assemble the Beads and Title
▶ Watch
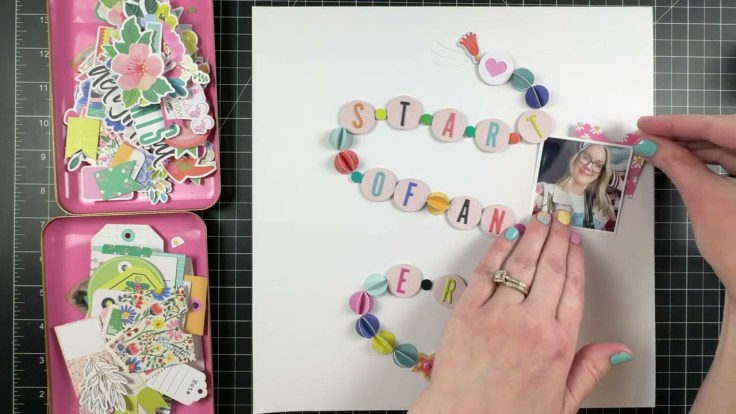
Begin arranging your beads along the squiggly line, starting with the heart bead and adding round beads on either side. Bring in your title, here it reads “start of an era,” and tuck foam stickers in between the letters because they look just like beads. Heidi popped up each letter with foam adhesive to make them more dimensional, and added a couple of tassel stickers from the May 2026 Embellishment Kit to break up the beads.
Step 6: Add Your Photo Clusters
▶ Watch
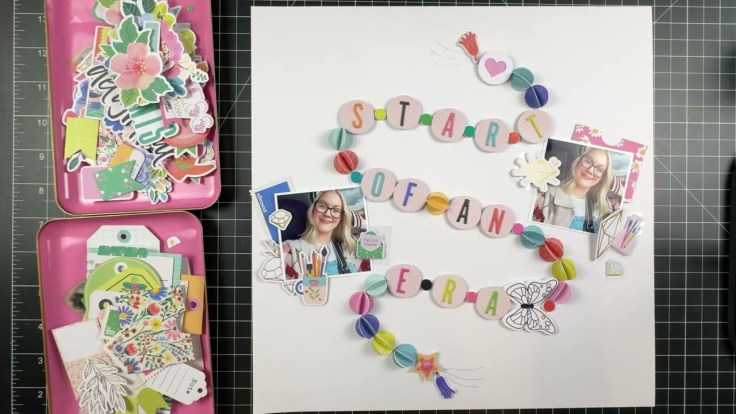
Bring in your photos, Heidi used two 2.5 inch photos that fit nicely in the natural curve of the bracelet. Let the illustration guide your photo size and placement, tucking them where there is naturally an open space along the curve. Aim to make your photo and embellishment clusters a similar size with similar elements so the whole layout feels balanced and intentional.
Step 7: Add Hand-Stitched Tassels
▶ Watch
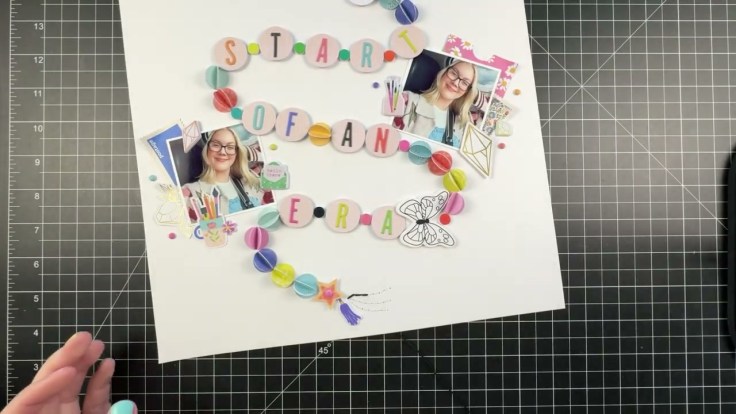
To make it look like the bracelet was made with real string, add a hand-stitched tassel on each end. Use a clear ruler and your Cricut weeding tool to punch evenly spaced holes, then stitch with all six strands of black DMC embroidery floss. Tie a knot, come up through the first hole, go down through the next, then back up and down through the same hole you just came through, repeating until your stitching is complete.
Step 8: Admire Your Finished Layout
▶ Watch

Step back and take in your completed Build-A-Bracelet layout! The handmade paper beads, hand stitching, and tassels all come together for a look that is so girly and feminine. This is such a fun way to recreate an illustration and tell a personal story on your page, and it proves you can build something stunning from just paper, punches, and a little patience.